
How to roll a cone
Joints are among the most popular ways to partake in a bit of cannabis, and among the most obvious visual signifiers of cannabis use. Once portrayed as a wad of twisted toilet paper, the joint has become a sleek symbol of the modern weed consumer, and their conical cousins are not just a goofy avatar of cannabis past, cone joints are big business.
A joint is considered a cone when the tip is wider than the mouthpiece. This method of rolling is preferential for anyone invested in the aesthetics of smoking, as the cone joint is a counterculture icon. Most crappy joints are as smokeable as a perfect cone, but one “looks” the part while the other is simply utilitarian.
This is why people sharpen their rolling skills — being able to pull out a beautifully executed cone is membership in the cult of stoner personality. It’s a rebel yell, it sticks out, clearly exclaiming that it is not a cigarette. Here’s how you can craft your own perfect joint.
A step-by-step guide to roll your own cannabis cone joint
First things first: choose your favorite cannabis strain.
Keep in mind that cones aren’t always mondo-sized behemoths with gram after gram of fancy weed inside. They come in pretty much any size, so try using the same amount of cannabis you’d put in a typical joint, then adjusting to your preferences. What makes a cone a joint is the shape, not the size (though they tend to lean a little girthy).
Materials
- Cannabis strain of choice
- Rolling papers
- Crutch or filter tip
- Pen or toothpick (used to pack down the weed)
Directions for a hand-rolled cone
Step 1 — roll your crutch
Roll a ½” diameter crutch with lightweight cardboard or purpose-made tips. Hold it on the rolling paper in the fold or crease with the adhesive gum at the very top
Step 2 — fill your roll
Sprinkle your desired amount of well ground flower along the centerfold, this can be anything from a half gram to an entire eighth.
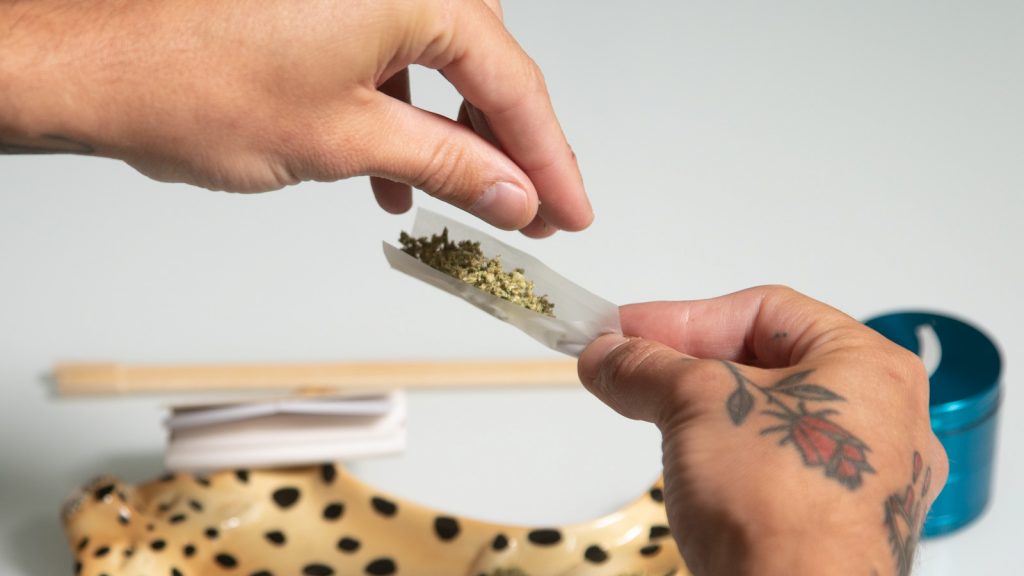 Gina Coleman/Weedmaps
Step 3 — shape your cone
Fold the excess paper up over the crutch and the flower using your thumbs and gentle pressure. Using a motion similar to snapping your fingers in slow motion, tuck the paper into the flower as you begin to form a joint.
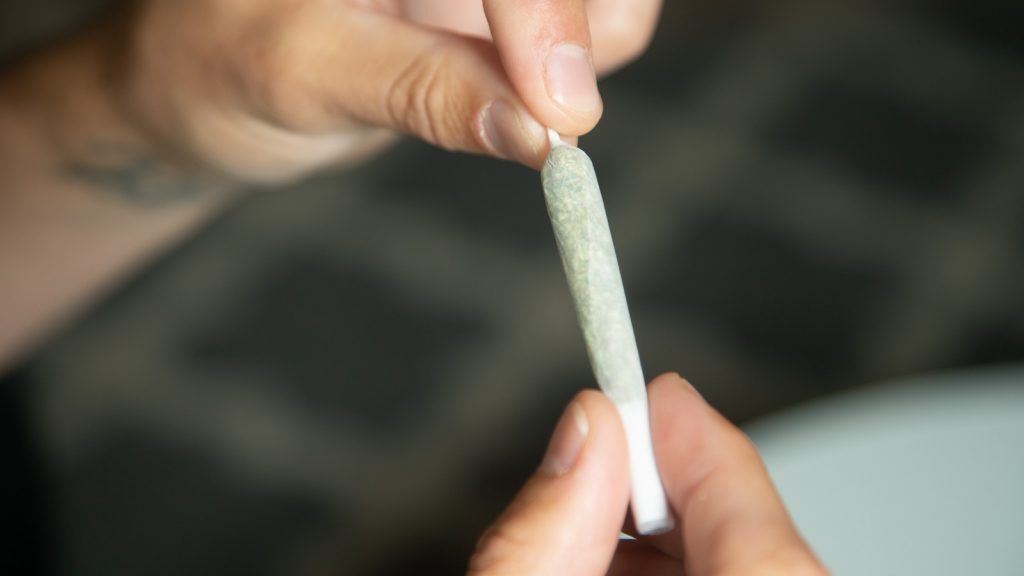
Step 4 — twist it up
When you creep up to the top of the paper, lightly moisten the gum strip. Quickly finish the twist upwards to seal the joint. Tuck or twist the tip and you’re ready for fire.
Tip: If you usually roll with your fingers evenly placed on the paper, then to get a cone shape it’s helpful to position them much closer to the edges. Some people make an angled crease in the paper before beginning to create a guide, maintaining a tighter wrap on the bottom with a slightly loose arrangement on the top.
Play with the tension you use at the top. Just like any joint, tight is good, but too tight means a sub-par burn. Conversely, if you roll or pack a cone too loosely, you’ll end up with a floppy and unreliable joint.
 Gina Coleman/Weedmaps
Directions to fill a pre-made cone
Step 1 — funnel your cannabis
Using a creased business card or sheet of paper, create a funnel for your herb. Depending on the size of the cone, you will need between ¾ gram and 2 grams of ground material to fill it up. Use the funnel to add a pinch of flower at a time into the cone.
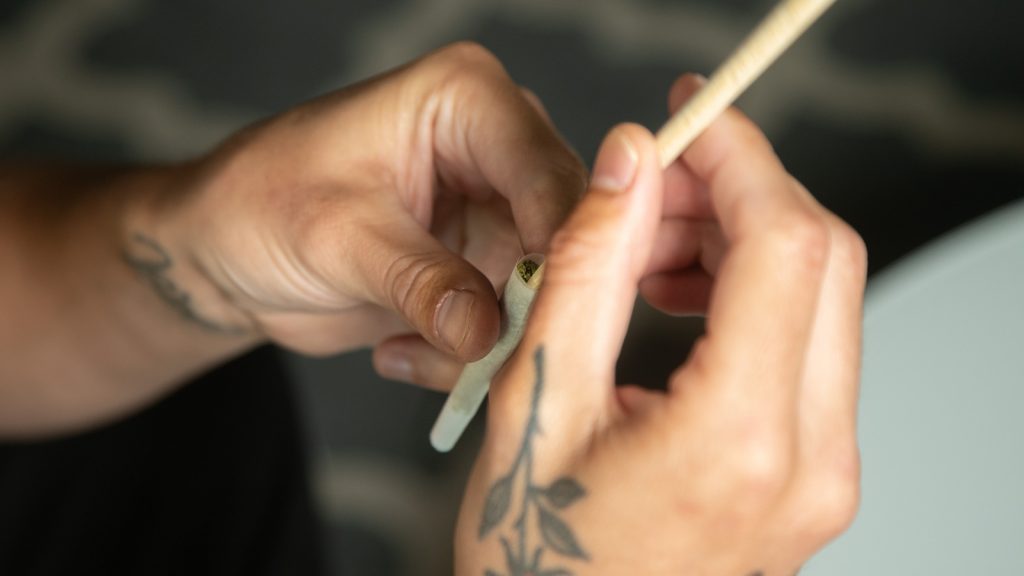
Step 2 — pack it down
Using a pen or toothpick, push the ground material down gently, without too much force. Continue to add and pack the flower until you reach the tip.
 Gina Coleman/Weedmaps
Step 3 — twist it up
Twist or fold the last ¼” of the cone into itself to create a bit of kindling for the flame of a lighter, match, or hemp wick.
The pros of cone smoking versus regular, uniform thickness joints are strictly personal. One doesn’t burn better than the other as long as they’re rolled proper.
Featured image by Gina Coleman/Weedmaps
The post How to roll a cone appeared first on Weedmaps News.
>View original article
Author: Danielle Guercio